D-Day to Berlin: “Review” Clarifications
D-Day to Berlin
In my last AAR (05/03/2021), I offered a first look at the WWII rules D-Day to Berlin (DDtB) by Chris Parker. On the plus side, I got most things right. On the minus side, I got a few things wrong. Chris set me and the record straight. — RL
Thank you for the compliment on combat and excessive hits.
Ground scale is actually 2.5 miles per zone which gives us an even 5 miles per two zones.
You are bit off on the activation. The player does choose a zone but then he decides how many battalions (called a force of 1 stand) are going to perform the same action. If you have four battalions you could perform one action with all four or an action for each one or any combination. You then roll for each force individually. A clever general who wants to attack usually chooses to roll for an all or nothing to get the attack started but sometimes if it is really important he will choose smaller forces to even out the rolls.
It is also worth mentioning that if the battalions (force) is in the Divisional HQ zone [square] they may reroll a failed activation roll.
I use a lot of Wally’s ideas and one of them is that if a player is going to roll he should at least have a 33% chance of it succeeding. He also says that most general attempts to move, shoot, etc. are about right at 70%. In activation a force within command range will succeed one way or another on a roll of 1-4 which is about 70%.
Wally Simon espoused the idea that the only events worth rolling for are those that have at least a 1/3 chance of success. Anything with a smaller percentage is not worth rolling.
On movement, one of Wally’s ideas was a constant movement rate with a 70% chance to cross into a different terrain. For example, if a unit had a 12 inch move, it would move 12 inches in any terrain, but when moving from one terrain to another (for example, like clear into woods, or swamp into clear), you have a 70% chance of doing so. If you make the roll, you continue moving the unit the remainder of its move up to 12 inches. If you miss the roll, the unit halts at the border, unable to move into the new terrain (even if the new terrain is easier than the existing terrain). Next turn, you need a 70% chance to head into the new terrain. If failed, the unit sits there. –RL
I know Russ dislikes rolling to activate, but I have found with most gamers that in the end they liked it and after a bit didn’t even notice it. And it does add just a bit of friction in the game.
Chris umpired a Zoom game for the Maine Historical Wargamers online convention, so I was able to try out the game. Read on for rules mechanics highlights, game recap, and my impression of the rules. –RL
D-Day to Berlin: The Zoom Game
by Russ Lockwood
I had only expected to sit at the virtual table quietly and observe for an hour, but being able to be the sixth player was a treat. He ran it via Zoom, using a couple of cameras and performing all the movement, die rolling, and camera positioning. It’s tough enough to be a GM at a ‘convention’ game, but having to do everything on the tabletop for the camera is even tougher. Nothing but praise from us players for Chris’ efforts.
Game Scale
The demo game was set during the Battle of the Bulge, with the US counterattack. The goal for the Americans was to grab three towns (one in each division’s sector). The Germans had to hold the towns.
DDtB makes the player a division commander, with each stand equaling a battalion. Each square on the table is 2.5 miles, and you can fit four stands plus a HQ into a square.
It’s a big scale, so tactical gamers will have to make allowances. You’re a division commander, not a company or platoon commander.
We Americans had three divisions: the 3rd Armored, my 80th Infantry, and the 33rd Infantry. I had not heard of the 33rd at the Bulge, but since US infantry divisions followed roughly the same TO&E, it could have been any infantry division. As it turns out, the 33rd served in the Pacific Theater, sez Wikipedia.
The three German divisions were the 5th Fallschirmjager (opposite the 3rd Armored), the Fuhrer Begleit Division (opposite my 80th Infantry), and the 26th Volksgrenadier Division (opposite the 33rd Infantry). OK, so Umpire Chris took a few liberties…
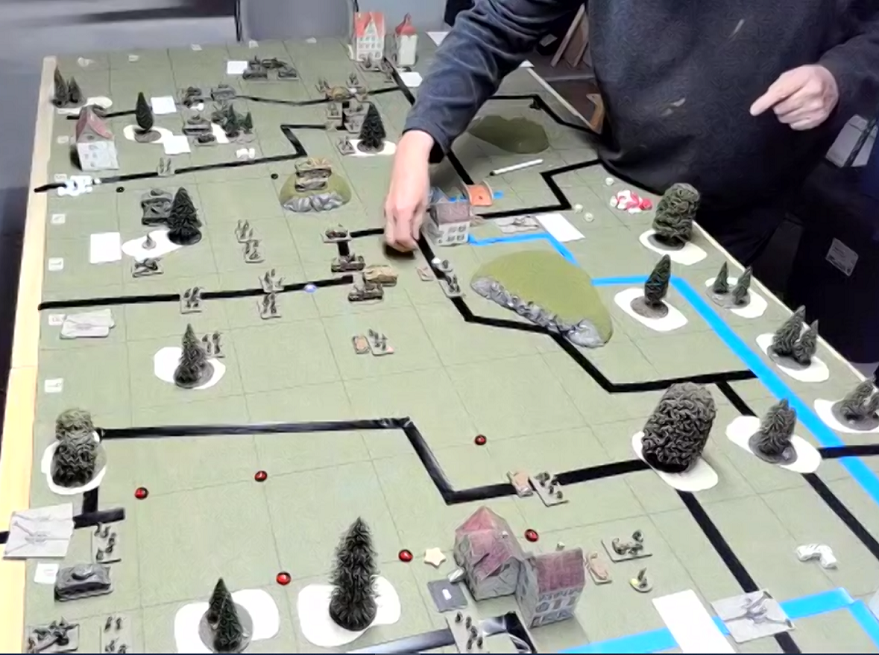
Breakthrough to Bastogne
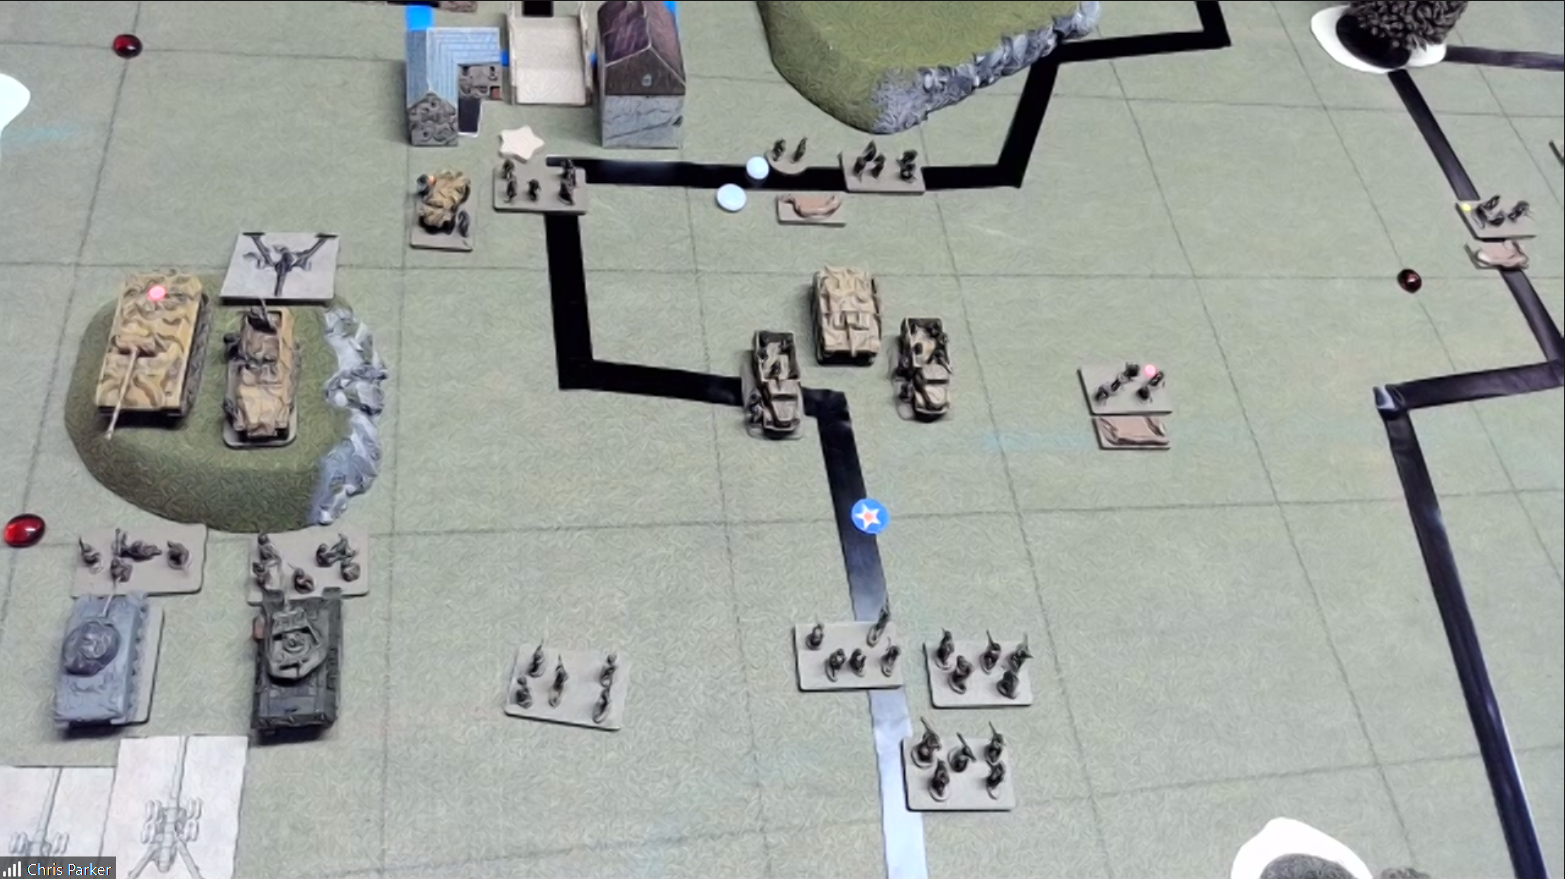
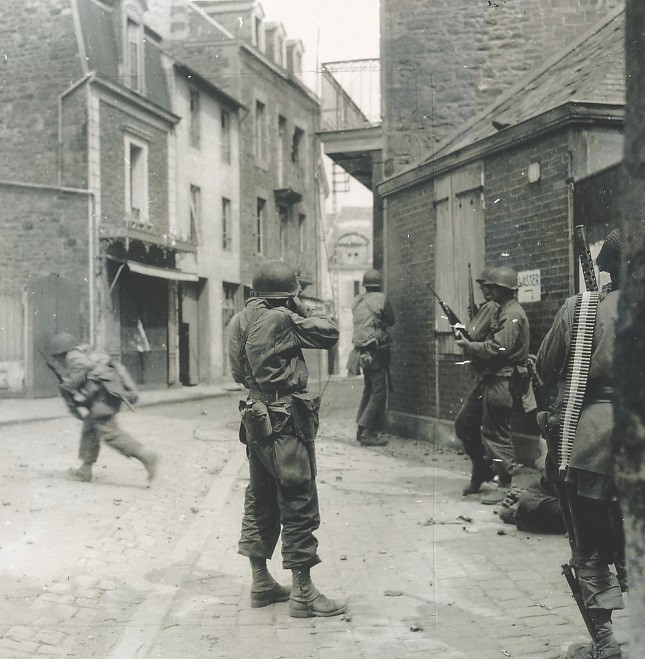
Screengrab of the beginning of the DDtB Zoom game. Allies on left, Germans on right. The middle third of Chris points out various terrain features. The red beads are divisional boundaries. The miniatures are on board. The paper artillery pieces represent off-board artillery. The star by the buildings represents victory towns. The black tape represents roads. Everything else seems self-evident. My 80th Infantry Division is in the middle.
Divisional Boundaries and the 80th
Each division operates within a set boundary. For simplicity’s sake, Umpire Chris made the boundaries of US and German divisions the same. In the photo, you can see red beads marking the boundaries — you were allowed to go outside your boundary by one square. In the rules, you can adjust your boundaries. In this demo game, we left the boundaries as is. When you read about at attack hitting a boundary — DDtB makes it a possibility. Boundaries are a nice touch.
I was assigned the 80th infantry division. Normally, a US infantry division has three regiments of three battalions. Alas, a regiment of mine was obviously on detached service somewhere else, for I only had six infantry battalions, not nine. Two of the detached battalions were assigned to 3rd Armor and unavailable to me.
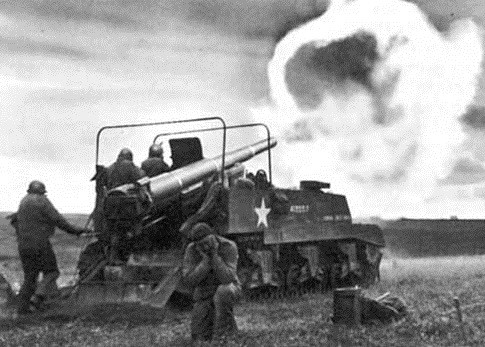
I also fielded the HQ, an engineer battalion, an AT battalion (M-10s), and a tank battalion (Sherman’s). I also had an artillery “battalion” — historically, an infantry division should have three 105mm artillery battalions (usually assigned one per regiment) and a 155mm artillery battalion. Umpire Chris makes the 105 assignments part of the combat process, but leaves the 155mm free to support any attack or defense. All totaled, 10 units on the tabletop. Plus, I had access to two off-board corp-level assets: 155mm artillery battalions.
Sequence of Play Flow
Remember that DDtB was gamed via Zoom. Tabletop activity took a little longer because Umpire Chris had to interpret gamer instructions. Many is the time when we gamers said something like “Move that stand up a square” or “Roll for the tank.” Well, obviously we knew the exact stand, but Umpire Chris had to figure out which stand we meant. We all got the hang of adding a bit of precision to our descriptions although Umpire Chris performed some neat mind-reading tricks from time to time.
In any case, the basic sequence was pick a unit or group of units, roll for activation, and then if passed, do something with them. Combat is by entering an enemy square — there is no artillery bombardment by itself. Failed activation’s with a ‘6’ also add a detrimental morale marker to the HQ.
Combat is by rolling a number of d6s. We picked that up quick enough — one per unit (any unit), plus one if infantry and mechanized form a “combined arms’ pair, one more d6 if the defending unit(s) are “poor” quality, and so on.
All things being equal, you look for 1s and 2s. If your units are at a disadvantage versus the enemy (like infantry attacking tanks, or combined arms pair without engineers attacking dug-in defenders), the enemy has the ‘weapon of choice’ and while you look for 1s, he looks for 1s and 2s.
Hits are applied to the square, one per enemy unit, with excess hits “applied” as detrimental morale markers to the HQ. When hit, the unit faces a choice: retreat one square, or stick around for a save test. Most infantry save on 1-2, with a bonus for being dug in or in favorable terrain (like a hill or town), and tanks on 1-3, with heavier tank like a Panther getting a second save and heavier tanks like the Tiger II getting second and third saves.
The attacker gets to toss dice first and inflict hits (if any) and retreats (depends on the defending player) upon the defender. If any defenders are left in the square, they roll dice against the attackers. Combat can last three rounds.
Combat is remarkably quick and you can get a fluid front as players retreat to avoid the save roll or stand fast because it’s an important square.
Shattered (Sha Oobie)
Now, if you blow a save roll, the stand is ‘shattered’ and removed from the tabletop. It’s not out of the game, just so disorganized that it is currently ineffective. At the beginning of a new turn, the player rolls for its return, delay (roll again next turn), or rout to the rear (‘lost’ in the rules vernacular).
When a unit is shattered, the division takes a division morale test that features a great big handful of dice. On turn 1, the Fuhrer Begleit Division blew a shattered roll with the Panzergrenadier battalion and had to roll 9d6 looking for a total of 26 or more to pass the divisional morale check. The mostly intact division rolled a total of 31 on the dice — no problem.
There’s more, but those are the highlights. That divisional morale mechanic is especially clever, for it can represent degradation of capabilities. Sure, an individual battalion might be fine, but the division could have been so beaten up, it would be fragile and likely to run away from even a small reverse in combat.
Turn 1: Friends Are So Alarming
We Americans rolled high and chose to go first. As David (3rd Armored) had played before, me (80th) and Brad (33rd) decided he should go first so we could see how it’s done.
The 3rd Armor moved up four battalions, added in artillery, and attacked four German units – hit for six hits. One hit went on each German unit, with the two excess hits creating two detrimental morale markers for the 5th Fallschirmjager HQ. The four Germans retreated.
As the Germans left the square empty, the 3rd Armor had to advance at least one battalion, or up to all four battalions, into the square. He advanced all four battalions into the vacant square.
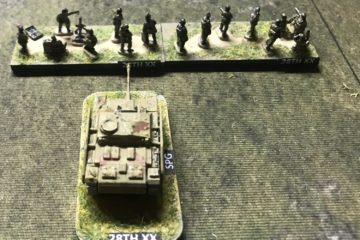
My mighty 80ID
My mighty 80ID, with arty support, attacks the Fuhrer Begleit, also with arty support, on the hill. My supporting attacks in the center turn out to be more hope than action.
Onward, 80th!
I went next. My units rolled for activation. Two infantry, the M-10, and the Sherman attacked the hill with one defending Panther and one Panzer Grenadier battalion. I added in two 155mm artillery strikes. That meant I rolled 8d6 — one for each battalion (4), plus two for combined arms pairs (2), and two for the two artillery battalions (2). I had no support from adjacent squares because they had enemy to front ZOC.
As the Germans held the hill, and I didn’t have any engineers, the Germans had the ‘weapon of choice’ advantage. That meant I was looking for 1s. Umpire Chris rolled for me and I scored two hits, placing one on each unit.
My opponent, John, would not give up such an important square in his line, so he opted not to retreat and instead took saving rolls for each unit. The saving roll for the Panther was 1-3 and it could roll twice due to its great protection factor. It passed. The Panzergrenadier unit failed and was shattered (sha oobie). Besides being removed from the tabletop, this shattering generated a morale check (9d6 looking for a 26 or more), which it passed.
The counterattack from the Panther and some German artillery scored a pair of hits. Having just seen the German vaporize, I retreated my armor.
We went to round two. I could withdraw, but I still had two infantry (2d6) and two artillery (2d6). I chanced the die roll and scored a hit. The Panther retreated off the hill and both my infantry battalions advanced to capture the hill. Technically, both had advanced into the square in the first place to attack and so stayed on the hill while the Panther retreated. Either way you look at it, I had the hill.
I call in the arty.
I also had an attack on a lone recon battalion that generated a hit. The recon unit retreated. I advanced.
A third US attack was sent in with only the engineer unit against two infantry and a St
A blown activation roll kept two infantry battalions fixed in place. I had rolled to activate the engineer unit first, made it, and moved through the square with the two infantry battalions into the attack. Then, I rolled for the pair of infantry and blew it. Thus, the engineer went in alone.
I had 1d6. No hits. The German defenders got a hit and I retreated back into the square with the two lolly-gagging infantry. What did they think? The war was over?
I also had an infantry unit behind my lines that blew its activation roll.
For those keeping track, I had five activation rolls and blew two, slightly worse than the 1/3 built into the game.
That ended my turn.
33rd: Directing Traffic
On our right flank, the 33rd Infantry launched a tentative attack on the 26th VG, mostly blown activation rolls prevented units from moving. With only one unit and artillery support, it pushed a German Recon unit back one square. I’m sure the Recon commander radioed back to division, “Found ’em!”
German Turn 1: I’ve Been Battered
The 26th VG didn’t have much to do. It was sitting pretty.
In the center, the Fuhrer Begleit Division called for an immediate counterattack. The Panther battalion failed to activate, but the STuG and two infantry battalions, with the weapon of choice advantage, dove into the Engineer and two US infantry battalions. The Germans put one hit on one infantry battalion. My boys retreated.
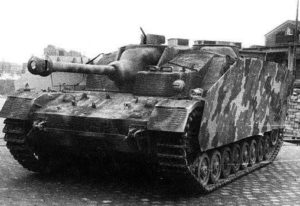
The STuG with three lives
The STuG led the attack
The US reply with an arty rolled 3d6 and managed three “1s” — a Yahtzee moment that stunned the Germans into calling off the attack and retreating. Oh yeah, it’s better to be lucky than good.
The 5th Fallschirmjagers suffered from a rash of activation failures. It was very frustrating for Mark. One of the players quipped the division had “no fuel.”
Given it was mostly an infantry division, maybe it was “no breakfast?”
That ended the first turn.
During the housekeeping phase, Umpire Chris rolled for off-board artillery. Most became available again. He rolled for reinforcements. And he rolled for initiative, which the Germans won. The Germans elected to go first.
Turn 2 Germans
The 5th Fallschirmjagers counterattacked and drove the 3rd Armor back, but otherwise remained in a strong position. It could have been much worse – 5FJ suffered from a rash of activation failures. If I recall right, three 6s in a row plus a 5 before getting a couple of 1-4s needed for the attack.
The Fuhrer Begleit Division also failed due to activation failures. They suffered from fuel problems, too.
The 26th VG had no reason to move and didn’t.
American Turn 2: I’m In Tatters
The 33rd stayed put. Blown rolls. So much for the right flank
I shift focus from the hill to the plain
My 80th, scenting fear in the German ranks, surged ahead with the tank and infantry quartet against an infantry and Recon. The infantry retreated, but the recon tried for a save and failed. The Germans passed another division morale check caused by the shattered recon battalion.
Sha oobie!
As the square was now vacant, I could opt for a Breakthrough attack into the town, but only with the Sherman and M-10 battalions. I thought a bit, but declined. Had the infantry been included, I would have gone for it, but it seemed an attack too far. The more I thought about it, the more the Breakthrough mechanic seemed clever, too.
On the right, the engineer and infantry, fresh from their successful defense, attacked an entrenched infantry and sent it packing.
Behind my lines, another activation failure kept the infantry well behind the advance.
The 3rd Armor put together a CCA attack that chased away a defending infantry. During the advance, it took a Breakthrough move into the next square, chasing two more infantry away. Now I know the Breakthrough mechanic was clever.
There the attack halted.
Pre-Turn 3 Housekeeping
This was the same as Turn 2, only some of the off-board 155mm artillery wasn’t available and the US won the initiative and decided to go first.
American Turn 3
The 33rd shrugged off its die-roll inertia and finally sent one Sherman and two infantry battalions along with some artillery support into a pair of dug-in German infantry, one of which was of poor quality, and a pair of Germany artillery. Out of 6d6, no hits. The Germans scored a hit on the M-10, which the US passed the save. Round two saw the US score a hit and the Germans save. Many German hits forced the US back and the attack halted.
80th: This Town’s Been Wearing Tatters
My 80th, now adjacent to the victory town, launched an attack against its one, scared, bedraggled defending infantry battalion. Due to terrain, it had the weapon of choice advantage.
On the first round, no hits by either side. On the second round, I scored one hit. The German battalion had a 50-50 chance of passing a save and did. On the third round, I scored one hit. The German battalion had the same 50-50 chance of passing a save and did it again!
US Troops Retire
US troops fail to winkle the Germans out of the town.
On the left flank, the 3rd Armor cleared the infantry from the dug-in position, used the Breakthrough, and overran an AT gun. AT guns do not have the option to retreat like infantry and tanks. I’m guessing this was a non-motorized AT gun.
I think CCB had a shot at moving diagonally and attacking the town, but the victory town was garrisoned by four units and would be a tough nut to crack.
German Turn 3
The 26th VG was sitting pretty and elected to remain in place.
The Fuhrer Begleit Division mounted an attack with the Panther battalion and two infantry battalions and kicked my armor-infantry pack backwards away from the town.
The 5th FJ managed to get back one of its shattered units and mounted a small attack. Otherwise, it was sitting pretty, too.
End of Game: Ain’t You Hungry For Success, Success, Success?
Umpire Chris called the game at the end of the third turn — equivalent to a day (DDtB also has a ‘night turn’ in his rules that we did not do). We had played from 8pm to 11pm in real time. Three turns in three hours isn’t bad for a Zoom game where everyone went one after another and most of us were new to the system. Blown activation rolls cut short some divisions’ turns.
My guess is that a turn would take about 30 minutes in a convention setting where people on a side moved simultaneously (and still ask questions). Grognards could handle a division no problem, probably dropping that to 15 minutes a turn if you figure that a third of the units won’t move, a third not hazard an attack, and the last third actually perform an attack.
I was able to see how the various subsystems meshed together, some quite well (combat especially), and some not as much — rolling for movement did indeed paralyze units 1/3 of the time, sometimes (5th FJ) rolling multiple 5s and 6s in a row ending that division’s turn. No fuel! No breakfast! No move!
Breakfast, German time
Maybe the Germans didn’t move because they had too much breakfast?
I will point out that at least one unit, an infantry battalion attached to the 3rd Armor, on the road, was never in battle, never in danger, and never activated or moved the entire game (1 day). Maybe they were at a USO show.
Chris noted that during the historical Bulge, a battalion of a VG division got lost in the woods for a day or so before it showed up for an attack. He joked it must have rolled a lot of 5s and 6s.
My Brain’s Been Battered, Splattered All Over
The 33rd was our hard-luck activation division. Brad exhibited patience with the roll for movement process, but he also didn’t game much. The 5th FJ was the German hard-luck rolling division.
And that’s my objection to rolling for movement. Many game systems possess such a mechanism and my preference is to game, not sit. As you can tell, DDtB offers plenty of opportunity to roll combat and morale dice and get yourself into trouble or have the opponent put you into trouble. Not moving doesn’t get anyone into any trouble.
I forgot to mention that when rolling for activation, a “1” will get you a double move. Black Powder/Hail Caesar have a similar mechanic — roll for movement with base 40% for no move and a small percentage to move 2x and even 3x to try and make up for sitting down for a picnic. Fire & Fury Brigade also has a similar mechanic with a ‘double time’ 25% movement bonus to offset slower or non-moves.
For DDtB, Chris noted that players do not have to roll one make-or-break die for all units in a square, but can roll for each unit, even if they are going to perform identical moves, to smooth out the rolls. He also noted optional Staff rules that provide free re-rolls.
To me, these nuances seem like fixes to a mechanic that can take a player out of a game. I know a lot of gamers enjoy rolling for movement. I’m just not one of them.
Russ’ Rule: If you don’t have movement, you don’t have a game and I came to game, not to sit.
Overall Impression: Flatter, Flatter, Flatter
Other than the roll for activation mechanic, DDtB has a smooth combat system and a clever morale system. Most veteran players will be able to pick up the basics in an instant, although some of the nuances to the divisional morale system might take a bit more effort to learn, especially concerning the number of dice to roll. It’s in the rules, but read carefully.
We did not play with US air support (Jabo), which has a 50-50 chance of adding from one to three dice to each US combat (assuming the weather is clear).
The number of combat dice we used in the game sometimes hit double digits, but usually not that high. You really need to concentrate to get that number of dice. I like the idea that even a single stand can toss a die and cause retreats and eliminations.
The square grid takes some getting used to, but I like the frontal ZOC locks. Some of the diagonal movement situations took an explanation from Umpire Chris, but again, easy to pick up once you understand the ZOC.
The Weapon of Choice idea, easily figured out using the table, offers a quick way to give attacker or defender an advantage — if one is there. That’s a quick way to differentiate units on a large scale.
I’m up for playing this again, preferably in person. When conventions roll around, give this a go!
Star Unit Of The Game: To Live In This Town You Must Be Tough
My vote goes to John’s Fuhrer Begleit infantry battalion that made two 50-50 saves in a row to keep the victory town. Make it a veteran unit for the next game!
Tough German Unit
The toughest unit in the game – defenders of the town
Zoom Fog of War
Umpire Chris set up multiple cameras in his basement to show different angles of the game. We kept pestering him to move the view this way and that, but it struck me that fixed viewpoints, adjusted for advancing, would be great for fog of war. I certainly didn’t pay much attention to my left or right when I was doing a turn. I should have, but I didn’t.
Now, if you could have one camera per player, each with a Zoom window open…
About Russ Lockwood
Russ Lockwood is most famous for creating MagWeb.com a former on line site which provided miniature gamers with an enormous information data base of magazines and e-books. In addition to his web achievements Lookwood is now pursuing writing and designing both books and game systems. Other titles include Snappy Nappy. Contributions to various magazines such as MWAN and Historical Miniature Gamer.
You can contact Russ at rlockwood1@chrisparkergames.com
Ready to purchase D-Day to Berlin? Go Shop
Chris Parker Peeps In
I must admit that when I set up and ran these two games for the Virtual Convention I relied on my Allied O.O.B. from my memory of 2 years ago when I ran it at a few conventions. I pretty much got it all wrong this time. The forces involved were…
3rd Corps
- 4th Armored Division
- 80th infantry division
- 26th Infantry Division.
Views: 380